Maintaining insect-free homes without hindering ventilation is crucial, particularly during hot seasons. Installing Pleated Mosquito Mesh for Windows is one of the most effective and fashionable methods. This mesh system serves its purpose and gives a trendy look to your window. If you are a DIY enthusiast who desires to carry out an installation, this guide provides a step-by-step process that makes it easy to install Pleated Mosquito Mesh for Windows.
Introduction to Pleated Mosquito Mesh
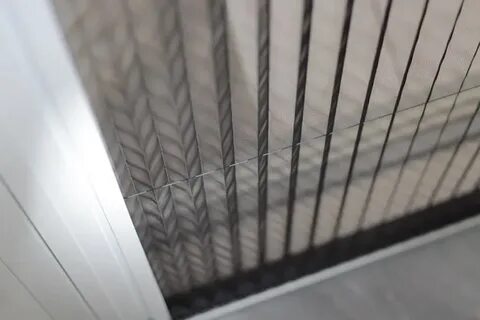
Before diving into the installation process, it’s essential to understand what pleated mosquito mesh is. Unlike traditional flat mosquito nets, a pleated mesh features a concertina-style fold. This design allows the mesh to be pulled open or closed like an accordion. It offers easy operation, better aesthetics, and space-saving benefits. Plus, it is an excellent solution for windows and doors in homes and offices.
Tools and Materials Needed
To fit Pleated Mosquito mesh for Windows, you will require:
- A pleated mosquito mesh kit (pre-sized or made-to-order)
- Measuring tape
- Pencil or marker
- Drill machine
- Screwdriver
- Screws and wall plugs
- Level (optional but helpful)
- Cleaning cloth
Step 1: Measure Your Window
Begin by taking measurements of the height and width of the window at which you want to install the mesh. Taking precise measurements is essential to avoid gaps in the mesh when installed and ensure smooth operation. If purchasing a customized kit, provide the supplier with these measurements.
Step 2: Clean the Window Frame
Clean the window frame with a wet cloth before putting it in place. It removes dust and debris, better adheres to your mesh system if it’s adhesive, and prepares the frame so that it may sit flush.
Step 3: Mark the Mounting Points
With a pencil or marker, mark the window frame where the pleated mesh frame will be installed. Ensure that the marks are straight and level so as not to have a sloping or skewed installation.
Step 4: Drill Pilot Holes
With a drill machine, slowly drill pilot holes at the marked locations. Be careful not to cause any damage to the window frame, mainly if the window frame is PVC or aluminum.
Step 5: Install the Frame
Put the pleated mosquito mesh frame on the window and connect it to the drilled holes. Use a screwdriver and screws to fix it securely. If the kit comes with a bottom guide or track, ensure it also aligns correctly and is firmly fixed.
Step 6: Test the Mesh
After the frame installation, carefully stretch the mesh over the window space to check the movement. The pleated Mosquito mesh for Windows should move freely both ways with no hindrance. If required, make subtle alignment adjustments.
Step 7: The Final Touch
Clean the mesh frame and vicinity of dust and fingerprints. Make sure all the screws and unions are tight. Your installation process is complete!

Conclusion
Pleated Mosquito Mesh for Windows is an easy and efficient way to protect your interiors from insects while enjoying a calm and elegant appearance. It only takes a little effort, patience, and a minimal set of tools to install it yourself and have a more comfortable home. Upgrading your home or installing protection on a new window, pleated mesh is a savvy investment that is both functional and elegant.